 50 min read
 Beginner Level
 Lesson 4 of 12
Lesson Objective
This lesson teaches the practical fundamentals of capturing high-quality audio recordings. You will learn about microphone types and selection, proper gain staging, recording environment considerations, and essential techniques for achieving clean, professional recordings regardless of your budget or space constraints.
What You Will Learn
- Different microphone types and their ideal applications
- The signal chain from microphone to digital recording
- Proper gain staging to maximize quality
- How to evaluate and improve your recording environment
- Microphone placement techniques for various sources
- Monitoring during recording sessions
Required Knowledge or Tools
Complete Lessons 1 through 3 before starting this practical lesson. Understanding digital audio basics, sound wave behavior, and DAW fundamentals provides the context needed to apply recording techniques effectively.
- Completion of Lessons 1-3
- A microphone of any type
- An audio interface or USB microphone
- Your chosen DAW installed and configured
- Headphones for monitoring
Core Concept Explanation
Recording is the process of capturing acoustic sound and converting it to a digital format your DAW can store and manipulate. The quality of your recordings depends on every link in the signal chain, from the sound source through the microphone, preamp, converter, and into your software.
Microphone Types
Dynamic microphones use electromagnetic induction to convert sound to electrical signals. They handle high sound pressure levels without distortion, making them excellent for loud sources like drums and guitar amplifiers. Their rugged construction and affordable prices make them common starting points for recording.
Condenser microphones use a charged capacitor plate that moves in response to sound waves. They capture more detail and higher frequencies than dynamics but require phantom power to operate. Condensers excel at capturing vocals, acoustic instruments, and room ambience where detail matters.
Ribbon microphones use a thin metal ribbon suspended in a magnetic field. They capture sound with a natural, smooth character favored for vocals and strings. Ribbons are more delicate and expensive than other types, typically reserved for studio applications.
Polar Patterns: Microphones pick up sound from different directions based on their polar pattern. Cardioid patterns reject sound from behind, omnidirectional patterns capture equally from all directions, and figure-8 patterns pick up from front and back while rejecting sides.
The Signal Chain
Sound travels from source to storage through multiple stages. The microphone converts acoustic energy to a small electrical signal. The preamp amplifies this weak signal to a usable level. The analog-to-digital converter samples the amplified signal and creates digital data. Your DAW records this data to storage.
Each stage can add noise or distortion if not handled properly. Quality components and proper gain staging minimize these additions, preserving the original character of the sound source.
Gain Staging
Gain staging means setting appropriate levels at each point in the signal chain. The goal is to keep signals strong enough to overcome noise floors while leaving headroom to prevent clipping. A good target is peaks reaching between -18 and -12 dBFS on your recording meters.
Recording too quietly introduces proportionally more noise when you boost the level later. Recording too hot risks digital clipping, which creates harsh distortion that cannot be fixed afterward. Finding the middle ground produces the cleanest possible recordings.
Recording Environment
Your recording space significantly impacts audio quality. Hard, parallel surfaces create flutter echo and standing waves. Untreated rooms add reverberation that may not suit your project. Background noise from air conditioning, traffic, or electronics contaminates recordings.
Acoustic treatment using absorption panels and diffusers tames problematic reflections. Strategic microphone placement can minimize room influence. Recording during quiet hours avoids external noise. Small improvements to your space compound into significantly better recordings.
Visual Explanation
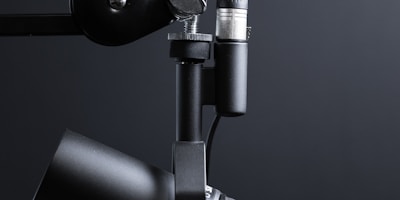
A professional microphone positioned for recording, demonstrating proper placement technique and acoustic treatment in the recording environment.
The image shows a common recording setup. Notice the microphone positioning, the acoustic treatment visible in the background, and the attention to isolating the recording source from reflective surfaces. These elements combine to capture clean, professional audio.
Why This Lesson Matters
No amount of mixing or mastering can fix a poorly recorded source. The phrase garbage in, garbage out applies directly to audio production. Time spent learning proper recording technique pays dividends throughout every project because you start with quality raw material.
Professional engineers spend years developing their recording skills because the difference between good and great recordings happens during capture. Understanding these fundamentals gives you the foundation to continue developing through practice and experience.
Critical Tip: Always wear headphones while recording to monitor what actually reaches your DAW. What sounds good in the room may not translate to what the microphone captures. Real-time monitoring lets you catch and correct problems immediately.
Step-by-Step Tutorial
Follow this process for a successful recording session:
- Prepare Your Space: Turn off noisy appliances, close windows, and minimize potential interruptions. Listen carefully for background noise that might contaminate recordings.
- Set Up Equipment: Position your microphone appropriately for the source. Connect it to your interface, enable phantom power if using a condenser, and create a new track in your DAW.
- Configure Settings: Set your sample rate and bit depth. Standard settings of 48 kHz and 24-bit provide excellent quality for most purposes.
- Set Input Gain: Have your sound source perform at performance level while adjusting the preamp gain. Target peak levels around -12 dBFS, leaving headroom for louder moments.
- Test and Refine: Record a test take and play it back. Listen for issues like distortion, excessive room sound, or handling noise. Adjust and test again until satisfied.
- Record Takes: When settings are optimal, begin recording performance takes. Keep multiple takes to choose from later. Note which takes felt best for reference during editing.
Common Mistakes and Misunderstandings
Mistake 1: Recording too hot trying to maximize signal. Digital audio has abundant dynamic range. Recording conservatively prevents unrecoverable clipping while modern DAWs easily boost quiet signals without penalty.
Mistake 2: Placing microphones too close or too far from sources. Extreme proximity creates boomy bass buildup from proximity effect. Excessive distance captures more room than source. Finding the sweet spot requires experimentation.
Mistake 3: Ignoring the recording environment. Investing in expensive microphones while recording in untreated spaces wastes that quality capturing room problems rather than source detail.
Mistake 4: Applying effects during recording. Print clean recordings and add processing later. Once effects are recorded, they cannot be removed. Keeping recordings dry preserves flexibility.
Practical Example or Scenario
Alex wants to record an acoustic guitar track for a song. He sets up in his bedroom, positions a cardioid condenser microphone about 30 centimeters from where the guitar neck meets the body, angled slightly toward the sound hole. This placement captures the guitar's full frequency range while avoiding excessive boomy bass.
He puts on headphones and plays the loudest section of the song while watching his DAW's input meters. The peaks hit around -15 dBFS, leaving plenty of headroom. A test recording reveals some room echo, so Alex hangs a blanket behind the microphone position to absorb reflections.
After another test confirming improvement, Alex records several takes of the song. He varies his position slightly between takes to capture different tonal options. Later, during mixing, he can choose the take with the best combination of performance and sound quality.
Lesson Summary
Quality recordings require attention to every element in the signal chain. Microphone selection should match your source, with dynamics handling loud sources and condensers capturing detail. Proper gain staging keeps signals above noise floors while preserving headroom. Your recording environment impacts results significantly.
Always monitor through headphones during recording to catch problems immediately. Record cleanly without effects to maintain flexibility during mixing. Prepare your space, set levels carefully, and capture multiple takes to ensure you have optimal material to work with.
The next lesson explores audio formats, teaching you how digital audio is stored and when to use different format options.