 50 min read
 Intermediate Level
 Lesson 15 of 35
Lesson Objective
This lesson introduces MIDI (Musical Instrument Digital Interface), the protocol that allows electronic instruments, controllers, and software to communicate. You will learn how MIDI messages work, how to record and edit MIDI data in your DAW, and how to use virtual instruments to create professional-sounding productions without recording live instruments.
What You Will Learn
- What MIDI is and how it differs from audio
- MIDI message types: Note On/Off, Velocity, Aftertouch, and Control Change
- MIDI channels and how they enable multi-instrument recording
- Recording MIDI performances in a DAW
- Editing MIDI in the piano roll editor
- Quantization and humanization techniques
- Using virtual instruments and sample libraries
Required Knowledge or Tools
This lesson assumes you are comfortable with basic DAW operation and have completed the earlier lessons on recording and editing audio.
- Completion of Lessons 1–14
- A DAW with MIDI recording and editing capabilities
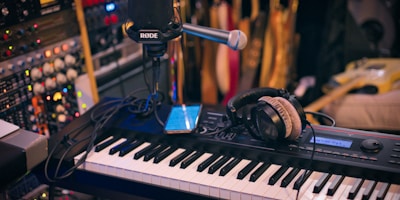
- A MIDI controller (keyboard, pad controller, or even a computer keyboard)
- At least one virtual instrument plugin (most DAWs include basic instruments)
Core Concept Explanation
MIDI is not audio. It does not record sound waves or frequencies. Instead, MIDI records performance data — which notes were played, how hard they were struck, when they started and stopped, and what control changes (like sustain pedal or modulation wheel) were applied. Think of MIDI as sheet music for computers: it tells an instrument what to play, but the instrument itself generates the sound.
The History and Purpose of MIDI
MIDI was introduced in 1983 as a standardized protocol allowing electronic instruments from different manufacturers to communicate. Before MIDI, each synthesizer brand used proprietary systems, making it impossible to control one instrument from another. MIDI solved this by creating a universal language that all devices could understand.
Today, MIDI is the backbone of modern music production. It allows you to record a piano performance on a MIDI keyboard, then change the sound to strings, brass, or synthesizer without re-recording. You can edit timing, transpose keys, adjust velocity, and correct mistakes — all non-destructively. This flexibility makes MIDI an essential tool for composers, producers, and arrangers.
Key Concept: MIDI files are tiny — a full song might be only 50 KB — because they contain only performance instructions, not audio data. The sound you hear comes from the virtual instrument or hardware synthesizer interpreting those instructions.
MIDI Message Types
Note On and Note Off messages are the foundation of MIDI. When you press a key on a MIDI keyboard, it sends a Note On message containing the note number (0–127, where middle C is 60) and velocity (0–127, representing how hard the key was struck). When you release the key, it sends a Note Off message. The virtual instrument uses this information to trigger and release sounds.
Velocity is crucial for expressive performances. A velocity of 127 is the hardest strike, producing the loudest sound. A velocity of 1 is the softest. Many virtual instruments respond to velocity by changing not just volume but also timbre — harder strikes might produce brighter, more aggressive tones.
Control Change (CC) messages transmit continuous controller data like modulation wheel (CC 1), sustain pedal (CC 64), expression (CC 11), and pan (CC 10). These messages allow real-time control over parameters beyond note pitch and velocity, adding nuance and expression to performances.
Aftertouch (Channel Pressure) is sent when you press down on a key after the initial strike, allowing you to add vibrato or filter modulation by varying pressure. Not all keyboards support aftertouch, but it is a powerful expressive tool when available.
Program Change messages switch between different sounds or presets on a synthesizer or virtual instrument. Pitch Bend messages come from the pitch wheel and allow smooth pitch changes up or down from the played note.
MIDI Channels
MIDI supports 16 independent channels on a single connection. Each channel can control a different instrument, allowing you to play a piano on channel 1, strings on channel 2, and drums on channel 10 (the standard drum channel) — all from one MIDI keyboard. In a DAW, each MIDI track can be assigned to a different channel and routed to a different virtual instrument.
Recording and Editing MIDI
Recording MIDI in a DAW is similar to recording audio: arm a MIDI track, select a virtual instrument, and press record. The difference is that you are recording performance data, not sound. After recording, you can open the piano roll editor — a grid where the vertical axis represents pitch and the horizontal axis represents time. Each note appears as a colored bar that you can move, resize, split, or delete.
The piano roll allows precise editing impossible with audio. You can correct wrong notes by dragging them to the correct pitch. You can adjust timing by moving notes left or right. You can change velocity to make a performance more or less dynamic. You can even draw in notes manually if you cannot play the part yourself.
Non-Destructive Editing: MIDI editing is completely non-destructive. You can always undo changes or return to the original performance. This makes MIDI ideal for experimentation — try different arrangements, transpositions, or rhythms without fear of losing your original ideas.
Quantization and Humanization
Quantization automatically aligns MIDI notes to a rhythmic grid, correcting timing errors in a performance. If you play slightly ahead or behind the beat, quantization snaps the notes to the nearest 16th note, 8th note, or whatever grid you choose. This is essential for tight, professional-sounding productions, especially in electronic music.
However, perfect quantization can sound robotic and lifeless. Humanization adds subtle random variations to timing and velocity, making quantized performances sound more natural and human. Many DAWs offer "swing" or "groove" quantization that applies rhythmic feel from real performances to programmed MIDI parts.
Virtual Instruments and Sample Libraries
Virtual instruments are software plugins that generate sound in response to MIDI input. They fall into several categories: synthesizers create sounds from oscillators and filters; samplers play back recorded audio samples triggered by MIDI notes; and modeled instruments use physical modeling or other algorithms to simulate acoustic instruments.
Sample libraries contain thousands of recorded samples of real instruments — every note, every articulation, every dynamic level. High-quality orchestral libraries can sound remarkably realistic when programmed carefully. The trade-off is that they require significant disk space and RAM.
Visual Explanation
A MIDI keyboard sends performance data to the DAW, which routes it to virtual instruments that generate the actual sound you hear.
The signal flow for MIDI is different from audio: MIDI controller → MIDI track in DAW → virtual instrument plugin → audio output. The MIDI data itself never becomes audio until the virtual instrument interprets it and generates sound, which then flows through the audio engine of your DAW.
Why This Lesson Matters
MIDI opens up production possibilities that would be impossible or prohibitively expensive with only audio recording. You can create full orchestral arrangements without hiring an orchestra. You can program complex drum patterns without a drummer. You can experiment with different sounds and arrangements instantly, without re-recording performances.
MIDI also enables precise control over every aspect of a performance. You can fix a single wrong note without re-recording the entire take. You can adjust the timing of one drum hit without affecting the others. You can transpose an entire song to a different key in seconds. This flexibility accelerates the creative process and allows you to focus on musical ideas rather than technical limitations.
Hybrid Workflows: The most powerful productions combine MIDI and audio. Use MIDI for flexibility during composition and arrangement, then render MIDI tracks to audio for final mixing. This gives you the best of both worlds: creative freedom during production and full audio processing capabilities during mixing.
Step-by-Step Tutorial
Follow this workflow to record and edit a MIDI performance:
- Create a MIDI Track and Load an Instrument: In your DAW, create a new MIDI or instrument track. Load a virtual instrument plugin — start with a piano or synth preset. Ensure your MIDI controller is connected and recognized by the DAW.
- Set Tempo and Time Signature: Set the project tempo to match your intended song speed. Enable the metronome (click track) so you can play in time. Set the time signature if your song is not in 4/4.
- Record a MIDI Performance: Arm the MIDI track for recording, start the metronome, and press record. Play your part on the MIDI keyboard. Do not worry about perfection — you will edit timing and mistakes afterward. Record multiple takes if needed and choose the best one.
- Open the Piano Roll Editor: Double-click the recorded MIDI clip to open the piano roll. You will see your notes displayed as horizontal bars on a grid. The vertical position represents pitch; the horizontal position represents time; the color or height often represents velocity.
- Correct Wrong Notes and Timing: Click and drag notes to correct pitch errors. Move notes left or right to adjust timing. Resize notes to change their duration. Delete extra notes or draw in missing ones using the pencil tool. Zoom in for precise editing.
- Apply Quantization: Select all notes (or specific sections) and apply quantization to the desired grid value (usually 16th notes for detailed parts, 8th notes for simpler parts). Use "strength" or "percentage" settings to preserve some human feel — 80% quantization corrects timing without making it perfectly robotic.
- Adjust Velocity for Expression: Select notes and adjust their velocity to create dynamic variation. Make accented notes louder (higher velocity) and softer notes quieter (lower velocity). Many DAWs allow drawing velocity curves or ramps for smooth crescendos and decrescendos.
Common Mistakes and Misunderstandings
Mistake 1: Confusing MIDI with audio. MIDI is performance data, not sound. You cannot apply audio effects like reverb or EQ directly to MIDI — you must apply them to the virtual instrument's audio output. However, you can apply MIDI effects like arpeggiators or chord generators to MIDI data.
Mistake 2: Over-quantizing to the point of lifelessness. Perfect timing sounds mechanical, especially for organic instruments like piano or drums. Use partial quantization (70–90% strength) or apply groove templates to maintain human feel.
Mistake 3: Ignoring velocity. Playing or programming all notes at the same velocity creates a flat, unmusical performance. Real musicians vary dynamics constantly. Spend time adjusting velocity to create natural phrasing and expression.
Mistake 4: Not using sustain pedal or other controllers. Many virtual instruments respond to sustain pedal (CC 64), modulation wheel (CC 1), and expression (CC 11). These controllers add realism and musicality that note data alone cannot provide.
Mistake 5: Forgetting to save MIDI data separately. If you render MIDI to audio and delete the MIDI track, you lose the ability to make changes. Always keep the original MIDI data, either on a muted track or in a separate project file, for future revisions.
Practical Example or Scenario
A composer is creating a cinematic track that requires strings, brass, and percussion. She does not have access to a live orchestra, so she uses MIDI and virtual instruments to realize her vision.
She starts by recording a string melody on her MIDI keyboard into her DAW. The initial performance has a few wrong notes and some timing issues. She opens the piano roll, corrects the wrong notes by dragging them to the correct pitches, and applies 85% quantization to tighten the timing while preserving the natural feel of her performance.
Next, she adjusts the velocity of each note to create a realistic dynamic contour — softer at the beginning of phrases, building to louder accents, then tapering off. She records modulation wheel (CC 1) data in real time to add vibrato to sustained notes, making the strings sound more expressive.
For the brass section, she programs the part manually in the piano roll since she is not a strong keyboard player. She draws in notes, adjusts their lengths, and carefully programs velocity to simulate the natural attack and decay of brass instruments. She uses a high-quality brass sample library that responds to velocity and CC data, producing a convincing result.
Finally, she programs a percussion part using a drum sampler. She quantizes the kick and snare tightly to the grid for a solid rhythmic foundation, but leaves the hi-hats slightly unquantized and varies their velocity to create a more human, less mechanical groove.
The final result sounds like a live ensemble, but she created it entirely with MIDI and virtual instruments. She can now transpose the entire piece to a different key, adjust the tempo, or swap out instruments — all without re-recording a single note.
Lesson Summary
MIDI is a protocol for transmitting performance data — notes, velocity, timing, and control changes — between controllers, instruments, and software. Unlike audio, MIDI does not contain sound; it contains instructions that virtual instruments interpret to generate sound. This separation allows for flexible, non-destructive editing and arrangement.
Recording MIDI captures your performance data, which you can then edit in the piano roll editor. Quantization corrects timing, velocity editing adds expression, and humanization prevents robotic-sounding results. Virtual instruments and sample libraries respond to MIDI input, allowing you to create realistic performances of instruments you do not own or cannot play.
Key Takeaway: MIDI is the foundation of modern music production, enabling flexibility, precision, and creative possibilities that audio recording alone cannot provide. Master MIDI recording and editing to unlock the full potential of virtual instruments and accelerate your production workflow.